Tuesday, April 24, 2012

Another Edition of Treat Tuesday!


So I don't really have much to say about today's treat other than that it's delicious. In fact so delicious that that's how it got it's name. Lady's and gentlemen, boys and girls, may I present to you the famous, the one and only, Delicious Cookies!
 

Delicious Cookies

1 Cup Butter
1 Cup Oil (don't use olive oil)
1 1/2 Cups Brown Sugar
1 Egg
2 Tsp. Vanilla
1 1/2 Cups Flour (I always use whole wheat)
1 tsp. Salt
1 tsp. Baking Soda
1 tsp. Cream of Tarter
1 Cup Quick Oats
1 oz. Package of Chocolate Chips

Blend butter and oil. Cream in sugar. Add eggs and vanilla. Sift together dry ingredients and then add to creamed mixture. Stir in oatmeal and chocolate chips. Drop on lightly greased baking sheer. Bake at 350 degrees Ferinheight for 12 minutes or until done. Makes about 6 dozen.

 I think the only down side to these cookies, is that the dough doesn't taste very good. Although, looking at how much cookie dough I usually eat, maybe that's not a bad thing. The dough just isn't that good because the quick oats need to cook in the oven for them to taste good, if you know what I mean.

Linked to Org Junkie

Monday, April 23, 2012

My Attempt at Jewelery Making

 So the other day I was feeling crafty and thought I'd do a bit of jewelery making. I'm not really that big into beading, I mean I like to do it, I'm just not very good at at. Anyways,here is what I came up with.
  These bracelets are super easy to make and they are going to be perfect for summer! All it is, is about 5 different strands of twine, all cut to roughly about the same size, a different bead put on each strand and then tied. I used this method of tying them, so that they could adjust.
 I made some with colored twine, to switch it up and give it a more "summery" feel.
 I then also made a set a little bigger as an anklet.
 After I had made enough of those, I tried something a little different. I used the same knot, but instead of putting a bead on the string, I strung the twine  it through a flower charm.


 I loved the results!
Bracelets are so fun and can totally add to an outfit. And with how easy it is to make them, there is no excuse for not having any!

Tuesday, April 17, 2012

Banana Chocolate Chip Cookies!

I can't believe how this week has flown by! And I don't mean that in a good way, we all ended up sick, and our business (more on that another time!) has been getting busier and busier as summer approaches! Thankfully though, I had a bit of time this morning to make these little gems, Soft Banana Cookies. Is there a better combination than banana and chocolate? I guess chocolate makes anything better.

Soft Banana Cookies

2/3 Cup Butter
1 Cup Sugar
2 Eggs
1 Tsp. Vanilla
2 1/4 Cup Flour
2 Tsp. Baking Powder
1/2 Tsp. Salt
1/4 Tsp. Baking Soda
1 Cup Mashed Banana
1 Cup Chocolate Chips

Cream butter, sugar, eggs, and vanilla. Add dry ingredients, mixing well. Stir in bananas and chocolate chips. Drop by with a spoon onto a greased cookie sheet and bake for 8-12 minutes at 400 degrees Ferinheight.
Yumm! Look at all that chocolaty goodness! And they're great for using up ripe banana's too!


Linked to The Organizing Junkie

Tuesday, April 10, 2012

Ready for your mouth to water?

Okay, before we get to today's treat, I want to show you a few pictures to get you ready.
 Mmmm....Look at all that chocolate!
 All that chocolaty sauce, just melting in your mouth!
 With just a light sprinkling of nuts...Yumm!
I just love drumsticks! They are my favorite ice cream treat. They or soooo good! Is your mouth watering yet? 
 Mmmm how about cheescake?

Do you like cheesecake?
 Isn't there something about cheesecake that just can't be beat?
As Hedy Lamarr says, "Because you don't live near a bakery doesn't mean you have to go without cheesecake."

Now you might think I'm being over dramatic and lame, and although that might be true, I had a purpose for all that cheesiness. I just was wanting to prepare you for today's treat. But first, let's do a little math.
As you can clearly see, drumsticks plus cheesecake equal drumstick cake, with just so happens to be today's treat!
I think the best part about this dessert, is that it is so simple and easy to make. And although it has cheesecake flavor, there is no baking, cooling, or cracking.
So here is how it's done:

First put on some tunes. Baking is always more fun when you have good music.
 Next you'll need to get out the recipe. As you can see our recipe has been well loved.
 Make the crust and press into the pan saving 1/2 cup for the topping.

 Make the filling.

 Drizzle chocolate sauce over the filling
 and gently mix it in, creating a marbleized look.
Sprinkle that 1/2 Cup of crust crumbs that you saved over the top.
Freeze, cut, and....
 EAT! It's a good idea to do this step when there are others around, just in case you are tempted to eat the whole pan.

Drumstick Cake
Crust
2 1/2 Cups of Oreo Crumbs 
1/2 Cup Crushed Peanuts
3 Tbsp. of Melted Butter

Filling 
8 Oz. Cream Cheese
1/2 Cup of Peanut Butter 
1/2 Cup of Sugar
4 Eggs
1 Large Tub of Cool-Whip
 1/2 Cup of Chocolate Sauce

Directions:
Mix all of the crust ingredients together. As I stated above, set aside 1/2 Cup. Press the rest into a 9x13 inch pan. For the filling cream the first three ingredients together. Add the eggs one at a time, mixing well in between. Fold in the Cool-Whip. Pour over Crust. Drizzle chocolate sauce over top and marble it through the filling (it works best to use a butter knife for this). Sprinkle that 1/2 cup of crust crumbs over top. And like a said before, freeze, cut, and eat.


Linking to Organizing Junkie 
Monday, April 9, 2012

I Love Cupcakes!

 I love cupcakes! Any kind of cupcakes! Chocolate, vanilla, spice, you name it, I love cupcakes!In fact I love cupcakes so much that I decided to make cupcake napkins! Yup! Twelve of them to be exact, Here, let me show you...
Aren't they adorable? I've done lots of sewing before, but this was my first applique project. I got the cupcake pattern from this book. I just used all my random scraps of pink fabric, so they all turned out different. I just LOVE them! But then again, I love cupcakes! Here is a picture of four of the different cupcakes.

 I did the "cherries" all the same color, so they would have something that unifies them.
The backs are three different pinks prints and the front is a very light solid pink.
I stitched them with bright pink thread.
The sad part of the story is that they are for my hope chest, so I won't actually be able to use them. But I guess they'll stay nicer that way, with no little brothers to stain them.

Tuesday, April 3, 2012

Tuesday!

Well, I guess it's Tuesday, and you know what that means right? A delicious treat! So here is today's delicious treat.
This is...well... a Campfire Banana Home Edition! or something of the sorts. I don't really know if it has a name. Usually they are made over the campfire, but you can make them in your oven too. Anyways here is the how to.
Start with a nice ripe banana.
Cut off the ends and make a slit down the banana only deep enough to go through the peel.
Grab some peanuts, chocolate, and any other toppings you would like (such as coconut, other nuts, or marshmallows. Basically anything that floats your boat.)
Next, stuff your banana with all the yummy toppings you picked.
When you're satisfied with the amount of toppings, loosely wrap up the banana in tinfoil.
Place the banana in the oven at 375 degrees. I used our toaster oven, because it's smaller, but if you don't have one, a full sized oven works too.
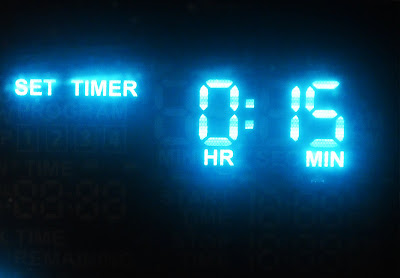
Set the timer for 15 minutes and wait.
 When it's done, pull it out of the oven and let it cool for 5 more minutes, then unwrap and enjoy!
The banana peel will be black after cooking it, so don't be surprised. This makes an excellent bedtime snack...Yumm!